PComp I: "Do one thing every day that scares you."
- Kay

- Sep 10, 2020
- 3 min read
The one thing that I felt scared about throughout the whole week was starting my first physical computing labs. I had the box of all the parts and tools, but I also had a tiny idea of what I need them for (I actually tried not to touch them at all, as each of them seemed so fragile!). So, I started from the easy part – reading. It was both exciting and familiar, thanks to the great physics teacher I had at school. Remembering such terms as resistance, voltage, current, amperes, ohms, and others was actually cathartic, as there was a time when I even understood all of that. The first lab was aimed at helping us understand what all the parts are for and that was a success!

Parts and tools for the labs
Sadly, when it came to the actual practical labs, that wasn’t such a success…I started with carefully (!!!) putting all the parts on the breadboard: Arduino, wires, and the LED. To my disappointment and realistic expectations, it didn’t work. I began to watch all the YouTube tutorial I could find and genuinely thought that the problem wasn’t in the scheme itself, but maybe the LED was broken. Thanks to my professor Yeseul, however, I finally made it work! Apparently, I connected the wires to Arduino wrong, so the scheme wasn’t powered. That was the first thing I did when I woke up today – I made the LED blink! More than that: I understood what the problem was and learned from it.
The process of making the circuit with the LED work
In the third lab, I learned how to use this strange machine called a multimeter. But first I had to unscrew the back panel to insert the saltwater battery (I felt like a professional mechanic at this point). I learned that I have a non-auto-ranging multimeter, so I have to choose the settings every time. I also played around with probes touching them together or my skin to see multimeter’s reaction.
Working with the multimeter
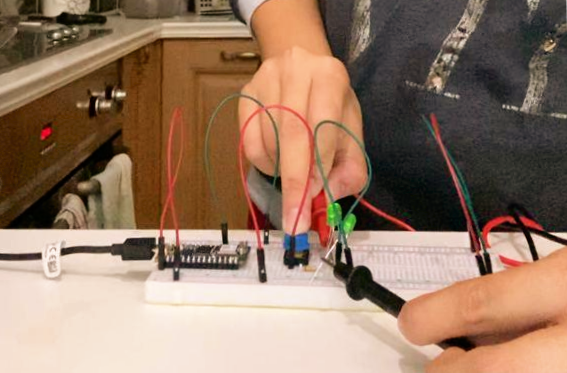
But the play time was over – I had to put together the switched LED circuit. I won’t lie it took some time, as for some reason the LED at first worked even when the switch was off (unsolved mystery if you ask me). But after some manipulations, the LED was blinking only when I used the button. Another problem occurred when I tried to add another LED in series with the first one. And no, I still don’t know how to make this circuit work. I do know, however, how to make two and three LEDs wired in parallel work (yay!!). Despite this small victory, when I used blue LEDs, they didn’t work, but I’m guessing it is related to how much energy they need. Anyway, this will be my question for the today’s class. Update: the blue LED worked, and my guess was correct! With Yeseul's help I could also make the LEDs wired in series work.
Putting together the switch LED circuit, then using several LEDs
The last lab for the first class was concerned with various types of switches. Frankly saying I had no idea that this number of switches can exist! For example, magnetic or whisker switches. Despite my enthusiasm, the projects for this lab were a disaster. I couldn’t make the switches wired in series or parallel work. I do hope, however, that today’s class will help me to understand the problem and transform it from the fail to the victory. Update: I made the circuits with switches work during the class!
Non-working circuit with several pushbuttons wired in series and parallel
Working circuit with 3 switches wired in parallel
Working circuit with 3 switches wired in series
Summary: I learned a LOT. It was very intense 6 hours of my life, but they were incredible. I was completely out of the comfort zone and encountered around 9 failures (and blew up one LED) to make something work. I still consider it a success because as Winston Churchill once said: "Success is walking from failure to failure with no loss of enthusiasm". And as you know, I’m still enthusiastic.


Comments